
January 2021. With the cool weather suspending any structural work, we have turned to tackling the cleaning and refurbishment of the numerous deck fittings, portlights and hatches.
With the boat under cover, its easy to remove all these without the risk of water entering the cabin or hull. Our plan is to systematically remove these items, clean, inspect and refurbish them before resealing them back in place. Since all of them have the ability to let water into the cabin if not maintained, we will be looking carefully for signs of past failure.
Portholes and lights. There are four portlights in the main cabin and four portholes, all bronze and a dark shade of green after years of neglect. Removing them was not too difficult once the clamping screws were out and the edge seal carefully broken by driving in a paint scraper and wedges. After removal, the porthole lights were separated from the ring and cleaning could begin. To avoid harsh chemicals, I used a mixture baking soda and lemon juice to remove the initial oxidation.


One benefit of doing this work is the ability to work indoors rather than in a drafty workshop. As you can see, the acid mix breaks down some of the oxidation after which it can be polished.


The bronze was polished with a combination of various flap wheels, Dremel sander and plain old hands. The outer rings were quite badly pitted and this can still be seen in the above picture. After cleaning, the seal ring was replaced with a strip of new material, held in place in the channel with contact adhesive. With no makers mark, it was impossible to tell who made the portholes so standard quarter inch square packing gasket strip was used.


Next, the portlights. These were cleaned in the same manner; first by an acid wash and then by polishing wheel and finally by hand. The results can be seen below.


Our objective is refurbish what we have rather then replace with new since that is an expensive option and newer may not always be better. These bronze fittings were well made in the ’70’s and there is no reason why they cannot perform for another forty years. We are unsure at this time what final finish, if any, to apply. Since the boat is not an Edwardian steam yacht, we have no desire to spend days polishing brightwork. So, we may finish these fittings with a coat of clear lacquer before they are re-installed.
Next; we pulled out one of the bronze scuppers.
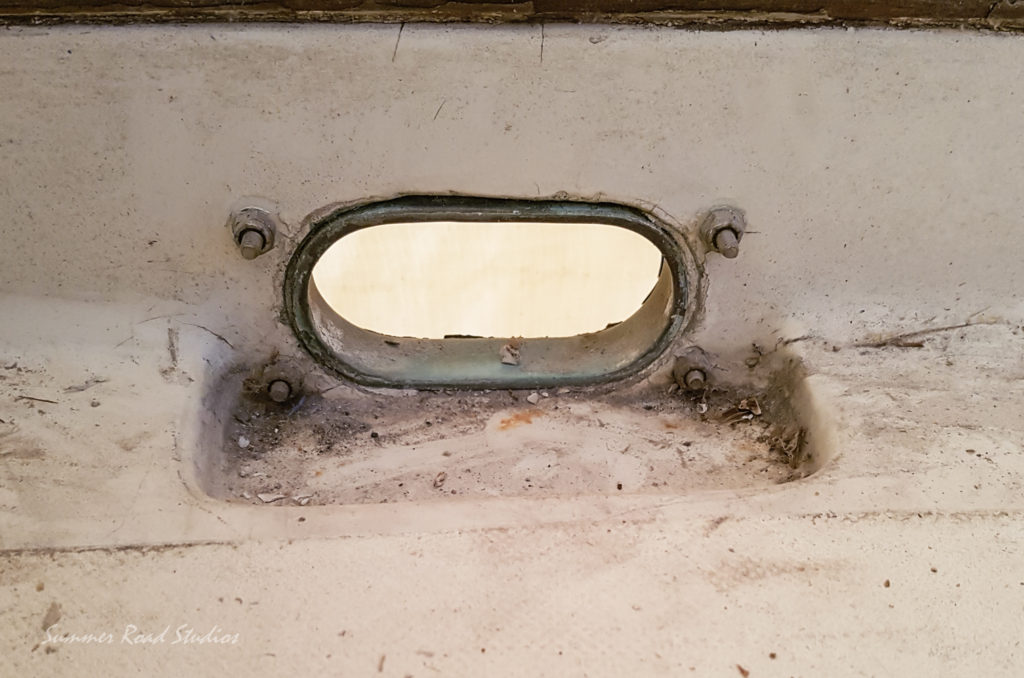


When the port side bronze scupper was removed there was an obvious gap showing on the bottom edge of the sealant between the hull and deck. I would have expected a solid band of sealant to have been injected into the joint at this point but although some was, this center section was open. After the old sealant had been completely removed and the surfaces cleaned, it was clear that this could have been a point of water ingress that caused much of the damage seen to the cabin woodwork below it. This is the lowest part of the boat and any water that accumulates in this deck well could potentially have worked down the hull into the cabin structure. Anyway, before the scupper fitting is replaced, we will apply sealant into this joint then add more when the fitting is bedded in. Let’s see what the starboard scupper shows….
Hatches. There are two hatches on the boat and up to now we have paid little attention to them, as you can see from the dust and dirt. Now, its time to take them out, examine, clean and refurbish them before bedding them back in. Like the portlights, if they can be refurbished it is the best course of action to avoid additional expense. I started on the front cabin hatch first since it had been cleared of construction materials. Removing the flange screws was easy once the hatch hinge pins had been driven out of the frame. Since they were stainless and the frame aluminum, this took some doing.


The hatches will be primed and painted with several coats of enamel whilst the seal strip, which has degraded in places, will be removed and replaced with new rubber. Since this is glued to the aluminum cover, I masked off the seal channel after removing all the old adhesive so that the new strip would be bonded directly to solid material. The seal channel can be seen in the picture above as the solid blue band around the edge of the hatch.
To avoid damage to the smoked acrylic during this process I covered it with masking tape and a piece of cardboard. There seemed little reason to remove the acrylic since it appears to free of scratches and has very little crazing showing.


There were no makers marks or characters on the front cabin hatch and it was interesting to see that the main cabin hatch was a different style but similar size. This turned out to be a Bomar model 520, whish it seems is today listed as a type 193. It was certainly a lot harder to remove from the deck opening so I wonder if it was actually the original whilst the front cabin was later replacement. Why else would a boat builder use different products of an identical size on one boat?


The Bomar hatch came apart quite easily since it used threaded screws for hinge pins and the acrylic sheet came out of the old bedding compound after a thin spatula blade was used to release it. The seal strip was hard and had no soft sealing properties left, presumably as a result of 40 years exposure to UV and salt spray. Like the front hatch, this one will be cleaned, primed and painted before new acrylic added. The existing piece is quite badly scratched and crazed so it will be used as a template to cut a replacement.
